
Email headers are the behind-the-scenes data of an email that determine things like its routing, sender information, and more. Although this data is generally hidden from view, understanding how it works can be handy when troubleshooting email delivery issues or launching email campaigns.
Table of Contents
In this article, we’ll give you a crash course in email headers, explaining what they are and how they work. We’ll also show you how to view and interpret headers.
What is the Value of a Full Email Header
Here are few reasons it may be necessary to review the headers:
- To investigate possible spoofing and determine the source of the message.
- To analyze timestamps along the delivery route and identify the source of any delay.
- To test any of the mail servers in the path to see if they are on a blacklist.
- To review Spam Assassin score
- To determine if the message was routed through a filtering server prior to arrival.
While reviewing email header information may seem very technical, internet investigations are NOT rocket science. If you know what has happened and to whom, the next step is to find out why by reviewing the contents of the email header.
What is an email header?
An Email Header or an Internet Header is metadata that accompanies every email and contains detailed information, such as the sender, receiver, route, timestamp, and more. Mailbox and email service providers use email headers to authenticate the email senders and properly allocate an email in the inbox.
Information in the Email Metadata is automatically generated. Even though there is a standard to what Email Metadata should include, there is no limit to what a mail server can add to it.
Difference between Full and Partial Headers
Partial Headers:
This is what you normally look at in your emails. The partial headers are the most important to your daily tasks. Such headers are the From Address, To Address, Subject, Date and Time, Reply to Address, CC, and BCC.
Full Headers:
The full headers are simply more technical information than you normally see when you check your email. Sometimes we need those extra headers to solve a problem.
The Basic Fields of an Email Header
Here are some popular email header definitions to better understand email features.
- Date: The date and time of when this mail was sent out.
- To: The addresses of the person or company being targeted. If there are multiple recipients, the email header will include all names and addresses of those who receive the message.
- Return-Path: If the message is rejected, it will be sent back to the email address listed here, which is also the sender of the message.
- Envelope-To: A line similar to Reply-To, identifies that the email was sent to the recipient’s reply address.
- Received: This line displays the servers through which the email went before reaching the recipient’s mailbox. To read it in chronological order, read from the bottom (where the email was originally sent from) to top (the destination of the email or, in this case, your computer).
- DKIM-Signature & Domainkey-Signature: This is a signature that verifies the authenticity of the sender. With DomainKeys Identified Mail, the domain is linked to the sender’s address. In this way, the sender is responsible for their mailings.
- Message-ID: This is a message identifier code. It has a standard format and is a part of the email address.
- MIME-Version: Allows you to send attachments in various forms, for example, text, audio, visual content, and more.
- Content-Type: Tells whether the email is in plain text or HTML format.
- X-Spam-Status: Tells you if the email is spam or not.
- X-Spam-Level: Displays the spam rating, normally generated by your service or email client.
- Message body: The main part of the email, the content.
How to check email headers in different clients
Below we’ll teach you how to view full email headers from popular mailbox providers.
Depending on your mailbox provider (and whether you’re using an app or webmail), the instructions will differ slightly, yet the information about Email Header metadata remains the same across all emailing platforms. To view headers, you need to first select the email by double-clicking on it.
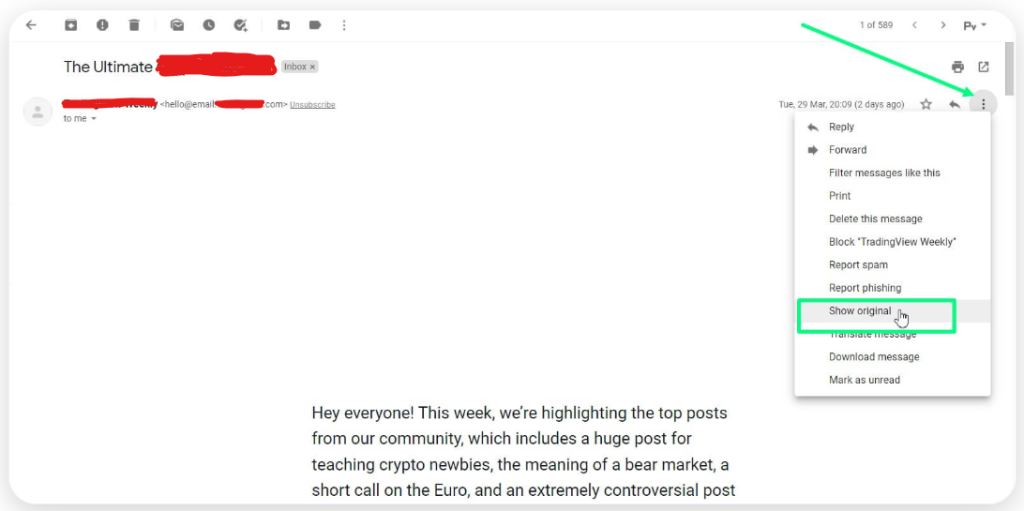
1. How to View the Email Header in Gmail:
Step 1: Open the Gmail webmail client on a new tab and click on the mail for which you want to see the message header.
Step 2: Ensure the message body is visible. Click on the three dots next to the Reply button to open the menu.
Step 3: The long header will display in a new window in its original HTML format. It will show some header field details like the IP address, authentication results, DKIM signature, Html code, and the MIME version.
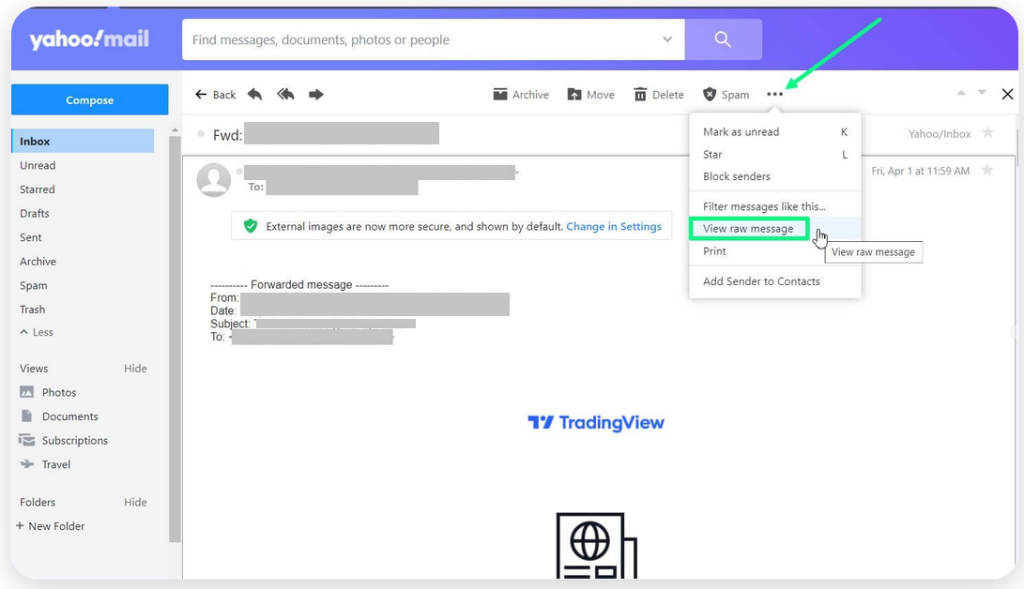
2. How to View the Email Header in Yahoo Mail
Step 1: Click and open the email for which you want to see the entire header.
Step 2: Click on the three dots next to the Spam button on the top right.
For a more detailed look at the header, click View raw message in the drop-down menu.
If you are an email user, this means that when you click on the Reply button, your message will be sent to them in a new window.
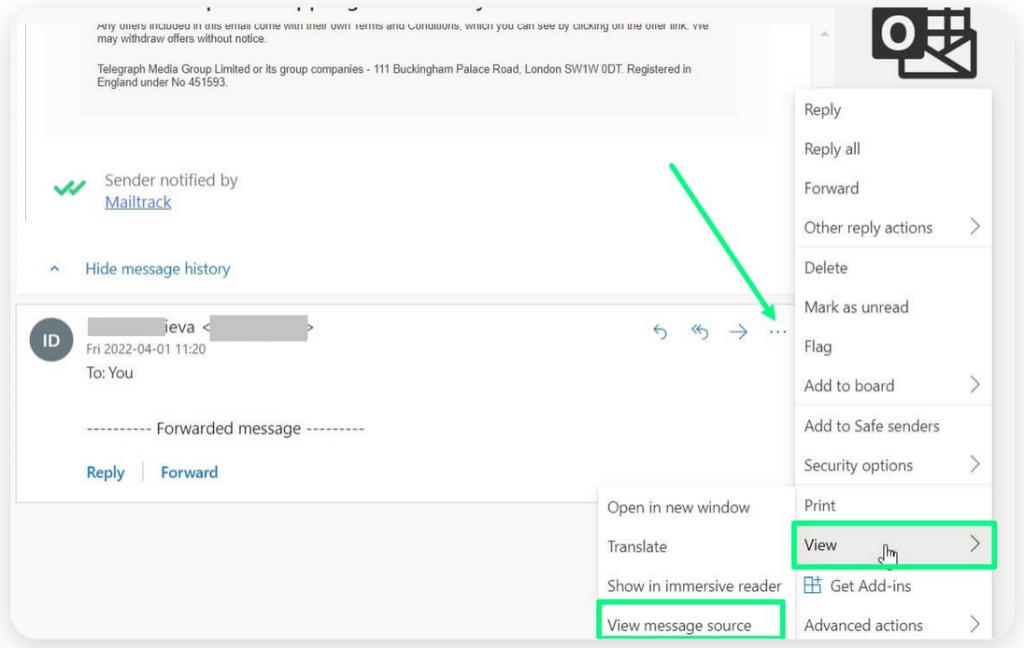
3. How to View the Email Header in Microsoft Outlook
Step 1: Double click and open the mail for which you want to view header details. It will open in a new window.
Step 2: Click on File, situated right next to the message tab, to open the file menu.
When you’re viewing a menu, click on the Properties tab at the bottom of your screen.
To find the mail sender’s IP address, you’ll need to go into your message source settings and look at the header information.
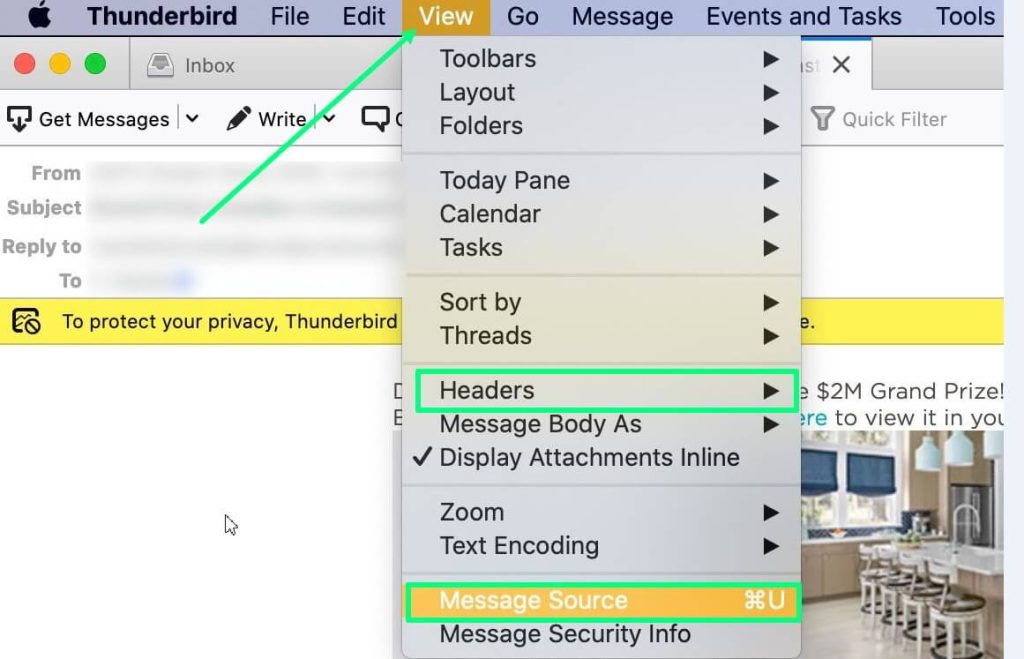
4. How to View the Email Header in Thunderbird
Step 1: Open email, click on View.
Step 2: Select Headers and mark All or.
Step 3: Select Message Source.
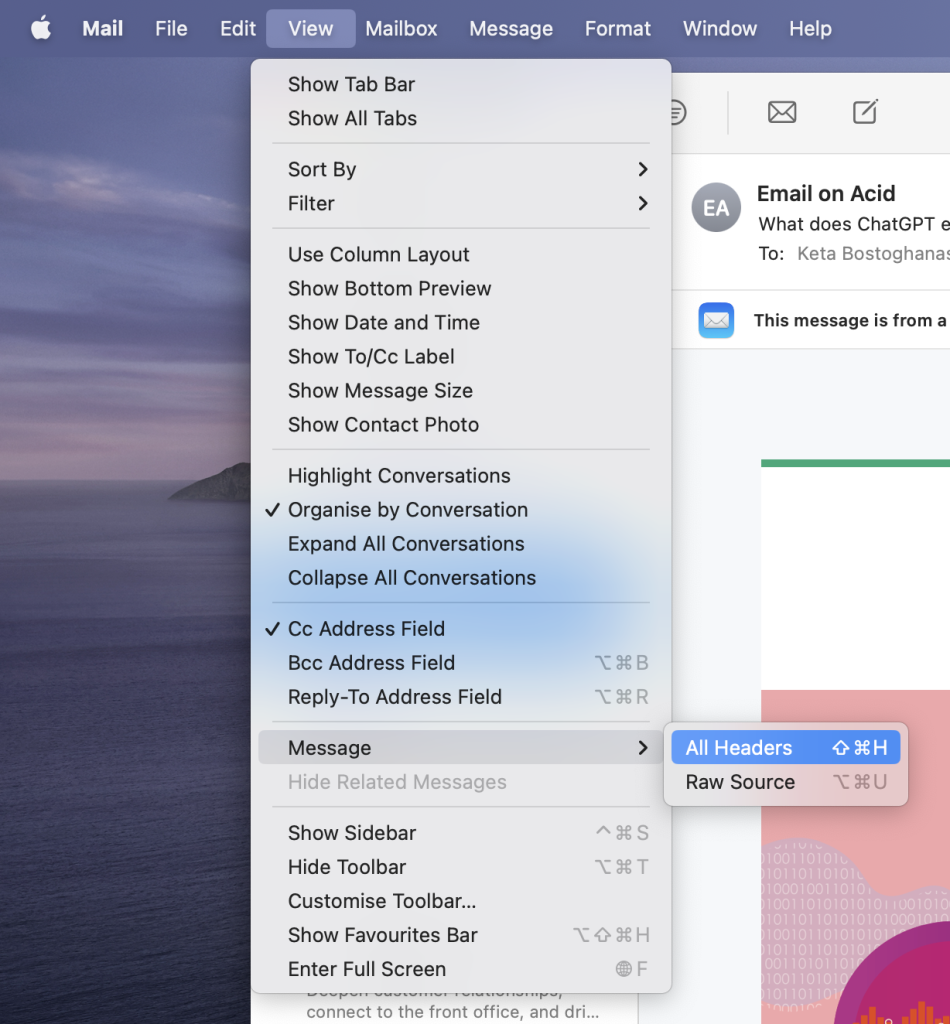
5. How to View the Email Header in Apple Mail
Step 1: Select View on the panel in the top-left corner.
Step 2: Select Message and then All Headers.
Conclusion
Having the correct Email Headers puts you at an advantage in achieving high email deliverability. With knowledge of the Email Headers, you will be able to understand how an email succeeds or fails to reach a recipient’s inbox. That allows you to implement the necessary security measures to improve your sender reputation.
When trying to improve your email deliverability and sender reputation, do remember to use the proper email testing and email sending solutions such as Email Testing and Email Sending of the Mailtrap Email Delivery Platform. These will automate things and help you spot errors along the way!